How do you build a CAN organizer?
1:2614:30DIY Can Organizer #anawhite - YouTubeYouTubeStart of suggested clipEnd of suggested clipAnd it just hit me it needs to be here on this wall I need a can food organizer where the can stackMoreAnd it just hit me it needs to be here on this wall I need a can food organizer where the can stack up high and they dispense about here. So I've already drawn up the plans for my wall organizer.
How do you make a can rotation system?
8:1010:13How To Build A Can Rotator For Your Pantry - YouTubeYouTubeStart of suggested clipEnd of suggested clipYou can put labels on the front here. If you are so inclined to keep track of you know tomato soupMoreYou can put labels on the front here. If you are so inclined to keep track of you know tomato soup or whatever the case may be basically. This is how they work just take cans feed them in on top.
Do food storage racks DIY?
1:329:02DIY Canned Food Storage Rack (Easy) - YouTubeYouTubeStart of suggested clipEnd of suggested clipI'm attaching these 26 inch boards with wood glue. And some finishing nails flush with the top andMoreI'm attaching these 26 inch boards with wood glue. And some finishing nails flush with the top and bottom of those 25 inch pieces.
How do I make a canned food dispenser?
0:198:50DIY Food Can Dispenser - with plans - YouTubeYouTubeStart of suggested clipEnd of suggested clipSo the first thing i want to do is cut this large sheet of one-quarter inch. Plywood now what i needMoreSo the first thing i want to do is cut this large sheet of one-quarter inch. Plywood now what i need to do is rip some strips for my walls. And my dividers. And then cut those to length.
Can Roller DIY?
9:4611:03DIY Can Holder Roller Project FIFO - Practical Prepper - YouTubeYouTubeStart of suggested clipEnd of suggested clipSo you can see here what it looks like now this is at an angle it doesn't look like much of one butMoreSo you can see here what it looks like now this is at an angle it doesn't look like much of one but it is wider here than it is right here and so when you drop the cans in the top it does roll down.
How do you build storage in FIFO?
0:0110:02DIY Can Storage System - FIFO - Cheap and Easy to Build! - YouTubeYouTubeStart of suggested clipEnd of suggested clipAs they begin to run down you can restock them and you put your newest cans at top. So your newestMoreAs they begin to run down you can restock them and you put your newest cans at top. So your newest cans are gonna be the ones you want to keep the longest. And you want to use your old ones.
Can storage ideas DIY?
0:182:04Cupboard DIY Can Rack Organizer | Small Space + Apartment Pantry ...YouTubeStart of suggested clipEnd of suggested clipSlide in the wire shelving. You can add as many as you want and then put your canned goods in this.MoreSlide in the wire shelving. You can add as many as you want and then put your canned goods in this.
How do you build storage shelves for canned goods?
6:2016:58How to Make Home Storage Shelves for Dehydrated and Canned FoodsYouTubeStart of suggested clipEnd of suggested clipOkay all right what I didn't know was I drilled eight holes all the way up on this side each holesMoreOkay all right what I didn't know was I drilled eight holes all the way up on this side each holes for eight shelves. And the hole is 3/8 inch drill bit is what you're gonna be using on each hole.
Can good shelf life?
Most shelf-stable foods are safe indefinitely. In fact, canned goods will last for years, as long as the can itself is in good condition (no rust, dents, or swelling). Packaged foods (cereal, pasta, cookies) will be safe past the 'best by' date, although they may eventually become stale or develop an off flavor.
How do you organize cans in a deep pantry?
3:0010:29DEEP CABINET ORGANIZATION | PANTRY CABINET IDEAS - YouTubeYouTubeStart of suggested clipEnd of suggested clipSo this row is actually double black beans because we use black beans quite a bit. So this wholeMoreSo this row is actually double black beans because we use black beans quite a bit. So this whole container and that whole container are black beans.
How do you build a food storage pantry?
1:3913:55Building an Efficient Food Pantry // Small Space w/ Shelving & StorageYouTubeStart of suggested clipEnd of suggested clipSo first of all the pantry. We decided to use plywood. And simply make clips that could be screwedMoreSo first of all the pantry. We decided to use plywood. And simply make clips that could be screwed onto the sides. So you can adjust the height depending on what should be. Stored.
Step 1: My Design
I decided to pare the design down to the very basics. Most racks use a series of slanted shelves that allow cans be loaded into the top and then roll down to the point where they get selected for use.
Step 2: Materials I Used
I did some measurements and discovered that my pantry shelves were 12” deep and 12” high. I had picked up a broken bookshelf to salvage for the wood, and luckily it was 12” deep! I found two scraps of 1” X 4” about 18” long each ( Not a critical length... you just need enough material to cut two pieces the height of your shelf).
Step 3: Build the Slanted Shelf
I measured the width of the pantry shelf space that I wanted to use. It was 34” wide. Yours may be different. I cut a piece of the 12” wide bookshelf to 34” minus the width of the two 1X4’s making it 32 ½” wide.
Step 4: Add the Uprights and Crossbars
I then took the 1X4’s and marked their length to the exact height of my pantry shelf (the distance between the top of one shelf to the bottom of the next shelf up). I attached these boards as uprights to the sides of the slanted board, flush with the front of the shelf but vertical. See the pics to understand how they are oriented.
Step 5: Test Fit and Load!
Now slide your new can organizer into your pantry shelf and check it for fit. Load it with the size cans you intend to use and when you are satisfied, take it out and give it a good paint job and add can-identifying tags if you desire. Total time for assembly: 30 minutes, total cost: only a few bucks. Works great.
Description
Storing cans of food has never been easier! This very efficient can storage unit makes rotating your food storage automatic – and you can customize it to meet your needs. The size is up to you. And, it stores a lot of food without taking a bunch of space. Ideal for easy access to the cans you need.
More About The Design Features
Storage unit as shown is approx. 7 ft. high, 14 inches wide, and 7 ft. long. It fits against a spare wall of a room so it doesn’t take much space. The height and length are easy to modify if you want. If that’s too wide, build it in a one shelf width instead. The design makes it easy to modify and better accommodate your individual needs.
Maximize Your Project
Plans from Mechanical Elements are an awesome start to a great project. And, these suggestions too.
We Found These For You . .
Our smallest ATV and off road vehicle specific trailer plans. Great for taking 2 ATV’s out, yet small enough for towing without a big truck. The size also makes for easier storage between the fun trips.
Step 1: List of Materials
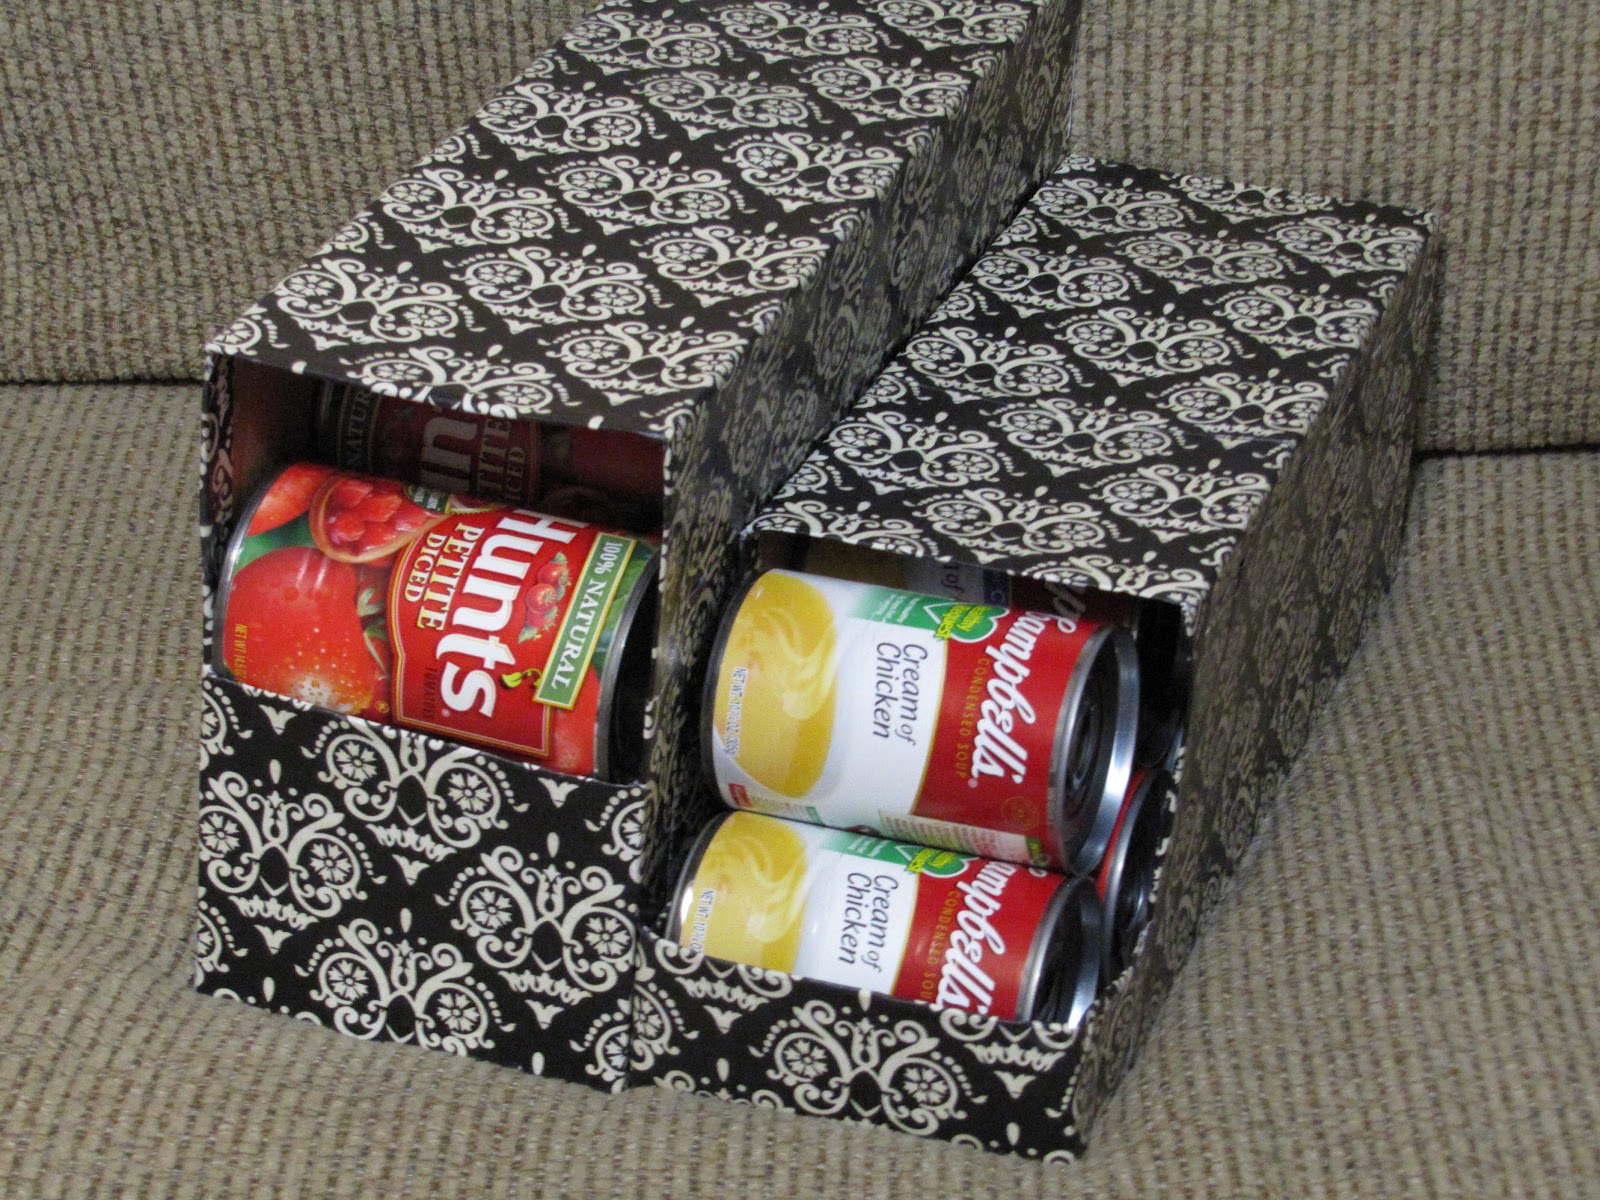
Here is your list of materials: Corrugated Cardboard Box ( 48 x 36 ) Ruler (preferably metal) Measuring Tape Scissors Exacto Knife Pizza cutter Pencil (or pen) Carpenter’s Square Glue (either a hot glue gun or paper glue) or Duct Tape I used a Large Mirror-pack from a recent move and it had enough cardboard to make three can-organizers.
Step 2: Understanding the Basics...i.e. Algebra
In order for this project to be effective the cans must ride down the Second Level shelf to the Lower Level shelf. Both of these shelves are at opposing angles to each other. These angles are predetermined by you, with consideration paid to the amount of space available.
Step 3: Lay Out the Grid
Once you have the cardboard on a flat work surface its time to lay out your grid and find your Y- and X- axis. Take note of the grain of your corrugated cardboard. Try to have the grains running the length of your ramps instead of across them. This will add some strength to the areas that get the most wear. 1.
Step 4: Draw Out the Plan
Now we can begin drawing out the sub-structure. 1.The Lower Level shelf will use the Y-axis as a reference line. From the Y-axis, measure out your value for W and draw a line. Draw a line that connects the Y-axis line to the line you just drew at the value of W. This should make a rectangle as in point (4). 2.
Step 5: Cut Out the Sub-structure
Now that the hard part is over its time to start making the cuts. Cutting out the sub-structures is a relatively simple process. I used an exacto knife against a straight metal edge to make nearly all of my cuts.
Step 6: Fold the Creases
Now that you have cut out the sub-structures its time to fold the creases. Form a crease where you need to bend the box’s tabs. Use a straight edge ruler or like device and a pizza cutter.
Step 7: Assemble the Second Level Shelf
As you begin the assembly process, start with the Second Level shelf. 1. Take the Second Level shelf cut out and draw the tabs. My shelf was 10" long so I divided it into sections at 1", 2", 2",.2", 1", 1" & 1". The next three 1" sections are for a ramp stop that when assembled will form a triangular shape the cans cannot roll over. 2.
How to Build a Rotating Can Rack
Print out the shelf diagram and determine what size of shelf you want to make. Click below for printable diagram and instructions.
Other Shelving Options
In case this task seems a little daunting, we do recommend a few options for shelves that you can purchase. These are worth a look at if you don’t have a lot of time or you want something a little sturdier.
Steps Download Article
Decide the size and number of shelves you need. This article will cover a 5-shelf system that is 32 inches (81.3 cm) wide, 24 inches (61.0 cm) deep and 64 inches (162.6 cm) tall.
Community Q&A
How can I print sample pictures, not just instructions? Would like very much to have full instructions and pictures?
Tips
Pre-drill your holes for the 2 inch (5.1 cm) screws by drilling a pilot hole completely through the dado (routed) slot. This was you will know exactly where to place the screws.
Warnings
Always wear safety glasses when operating or using any type of power tool.
About This Article
wikiHow is a “wiki,” similar to Wikipedia, which means that many of our articles are co-written by multiple authors. To create this article, 23 people, some anonymous, worked to edit and improve it over time. This article has been viewed 449,921 times.
